Monday, May 25, 2009

Photo etch wing components

Yesterday I tested my new white lacquer primer on Tamiya plastic. It turned out just fine, with no problems. So today I'll continue preparing to finish priming the kit.

Here is a rear wing element. Unfortunately the putty fell out.


So we'll have to apply putty again


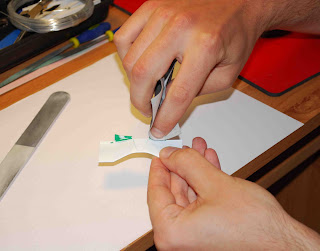
This is going to be fun, there are amongst the smallest parts I've seen for a plastic model kit. Here I am cutting the tiny rear wing supports off the tray of photo etch parts.


Here's what we are looking at many times magnified.


So here's my plan, flip it over with an exacto knife.


Stick it to scotch tape.


Tape the part to a vise


Close the vise


Make sure that half the part is held by the vise, and the other half is exposed


Use pliers to bend it to a 90 degree angle


Remove from vise


Fold over all the way


Here's what we're left with


And this is what they look like when glued into the rear wing uprights. They will serve as rear wing element supports.


Total: 75.5 h (mostly because I dropped the parts on the floor a couple of times and had to find them!)

Sunday, May 24, 2009

More primer

Messing around with my camera, I got a nice picture of the tray of photo etch parts that I'm using. Today I'll be priming the rear wing components.


Here is the paint I'm using. The Tamiya white fine surface primer is really fantastic, but at 50+ PLN in Poland, a bit expensive for me. I picked up this lacquer white primer at a Norauto store in Krakow. I know it will work just fine on the metal components, but I'm a little nervous about this unknown lacquer on plastic. I'll be priming some plastic parts from the kit that I don't plan on using, we'll see what happens.


I had to putty up a seam on the underside of the monocoque.


This seam became evident after priming, looks to be good now.


Another visible seam was on the top of the roll hoop.


Should be good to go now. If the lacquer primer passes the experiment today on Tamiya green plastic, then I'll go ahead tomorrow and paint the monocoque with primer as well.


Total: 72.5 h

Sunday, May 10, 2009

Hose to nowhere?

Bridge to nowhere?


Hose to nowhere?


I've been struggling for a long time to figure out what these hoses are, where they come from and where they are going. The Jordan 191 has a very elegant and simple design; using reference photos it's possible to figure out what most of the parts are for. At some races the car feature a radiator mounted in between the rear wing pilons. As can be seen in this photo, these random hoses do not connect to that radiator.


See, they don't connect to the radiator, some other hose connects here.


Where are they coming from? Radiator overflow drain hoses? I thought F1 cars had an air spring tank for this purpose.


I give up. It's the car's tail?


So here is my starting point for the day


Detail master braided hose. This is pretty impressive stuff, highly recommended.


Here's my plan: these hoses come from nowhere and go nowhere. They are essentially noise. The engine compartment of this car is going to be busy...so let's get busy. Here I'm drilling a couple of holes in the top of the gearbox near the engine. The hoses will essentially "disappear" here.


So, now that I've got the holes drilled, I pulled the hoses through and cut them to length.


To create the black nylon mesh effect, I painted them with Tamiya semi-gloss black.


Then I pulled the hoses down just a little bit until the painted black part was pulled into the gearbox and glued them.


I'll outline how I did this kind of thing at some other time. Let's just say it's time consuming. I'm pretty proud of the way it turned out.


Total: 71 h

Friday, May 8, 2009

Front wing modifications II

I'm going to basically finish up the sanding and filing on the front wing today.

As a side note, I've finally learned a little bit about flash photography. Almost all the the pictures that have been featured on my blogs up to this point have been taken without flash using the a timer on the shutter and a tripod. I've been expirimenting with my new Nikon D60, and I believe that I've finally got the white balance set just right for my environment to use the flash.

Here is my starting point for the day.


I grabbed some paint again, and just painted some rough lines to get started filing.


Here using a flat metal file.


I'm now done with filing material away on this front winglets. To make the curves just right, it's essential to have a rounded file as pictured here. I got this stuff at my local Castorama, these sorts of files should be cheap and common.


Here you can now see the profile of the front wing.


Got out my Micromesh polishing kit (a must have!) and a nail file I picked up at Rossman.


Polishing out the deep scratches I made during the modifications


And finally, drilling out the front wing endplates. There are guides molding in where front wing adjustments are made. I'm just opening them up.


This is what I wanted to make


And here is my interpretation, courtesy of Tamiya and some elbow grease


Front wing endplates


Total: 65 h

Tuesday, May 5, 2009

Front wing modifications

Here we go, we're going to modify the front wing to represent the Jordan 191 as driven by Schumacher in the Belgian GP. As mentioned in the last post, the front wing had a different profile for this and some other late season events.

Here is a picture of the primed front wing as it comes box stock


First things first, removed some of the details that will be replaced by photo etched parts. Did this carefully with an emory board.


Next cut out a couple of the photo etch parts that will double as templates for this modification.


Used a flat metal file to smooth out the metal nubs where the photo etch part was connected to the tray.


I just grabbed whatever color paint was handy, and while holding the photo etch part with my finger, painted carefully around it's edge.


Then filed away with an emory board and a curved metal file I picked up a long time ago at a hardware store.


Here are both the wing elements modified


This is where we were


This is where we are


More to be modified later, but that's it for today

Total: 62 h